
N-Fab Nerf Bars Scratching Your Truck’s Paint? Here’s How to Prevent and Fix Contact Damage
Nerf bars and side steps deliver functional benefits — easier bed access, rock protection, a cleaner entry point — but they also introduce new contact surfaces that weren’t part of your truck’s original design. Over time, vibration, flex, and shifting loads can allow those bars to migrate inward far enough to rub against paint.
We’ve seen hundreds of install photos and service calls over the years, and paint wear from nerf bar contact follows a predictable pattern: it starts as a barely-visible scuff on the cab corner or rocker panel, then deepens into exposed metal if left unchecked. The good news is that every case we’ve documented was preventable with the right mounting hardware, regular inspection intervals, and a few material barriers between steel and clearcoat.
This guide walks through the mechanical reasons nerf bars drift toward painted surfaces, the inspection points that catch the problem early, and the repair steps that restore finish without repainting entire panels.
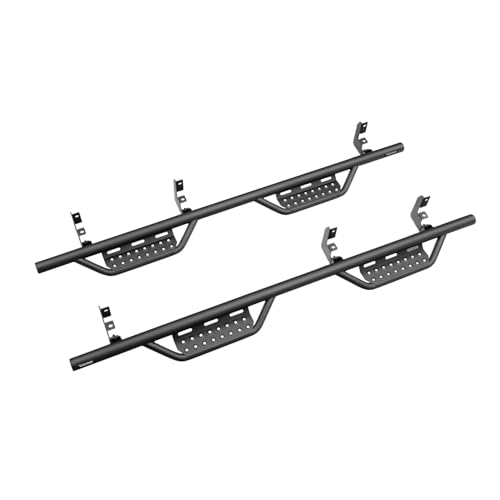
Why Nerf Bars Move Closer to Your Truck’s Body Over Time
Factory torque specs assume a static load, but real-world side steps absorb thousands of entry cycles, road vibration, and lateral forces from uneven terrain. Each of those inputs introduces micro-movement at the mounting bracket — not enough to loosen the bolt visibly, but enough to compress thread lock compound, settle gasket material, and shift the bar’s resting position by a few millimeters.
That shift wouldn’t matter if clearance were generous, but most crew-cab designs leave only 12-18 mm between the bar’s upper edge and the rocker panel’s lowest paint line. A 5 mm inward migration — easily achieved after six months of hard use — closes half that gap.
Flex under load accelerates the process. When you step onto the bar with your full weight near the rear mounting point, the entire assembly pivots slightly around the front bracket, and the unsupported center section bows inward. If that deflection brings the bar into contact with paint even once per entry, you’re scribing a wear line every time someone climbs in.
Inspection Points That Catch Paint Wear Before It Becomes Visible Damage
Monthly Visual Check
Park on level ground and crouch beside each mounting bracket. Look for dust patterns on the rocker panel directly above the bar — a horizontal smudge line means contact is already happening, even if paint hasn’t chipped yet.
Run your finger along the bar’s top edge where it passes closest to the cab corner. If you feel a ridge of transferred clearcoat or a tacky residue, the bar is rubbing during flex cycles.
Torque Verification Every Six Months
Use a calibrated torque wrench to confirm each mounting bolt still meets the kit’s spec sheet value, typically 35-50 ft-lbs depending on bracket size. Undertorqued hardware allows the bar to rock during step cycles, which closes clearance gaps unpredictably.
If a bolt spins freely before reaching spec, the threads have stripped or the bracket has deformed — replace the entire mount before continuing to drive. Proper bracket installation and torque maintenance prevents the kind of gradual loosening that leads to contact damage in the first place.
Load Deflection Test
With the truck parked, place your full weight on the bar’s center section while a second person measures the gap between bar and rocker panel with a feeler gauge. If clearance drops below 5 mm under load, the bar will contact paint during normal entry — add a reinforcement bracket or switch to a stiffer design.
Material Barriers That Protect Paint Without Compromising Bar Function
Clear helicopter tape — the same urethane film used on leading edges of aircraft components — bonds directly to the rocker panel and absorbs abrasion without marking the bar or leaving adhesive residue. Cut a strip 50 mm wide and apply it along the contact zone, wrapping the lower edge around the panel’s return lip for mechanical grip.
PEEK washers installed between the mounting bracket and frame rail act as low-friction spacers that prevent metal-on-metal vibration transfer. They also allow you to dial in exact standoff distance by stacking washers in 1 mm increments until clearance meets your target.
For trucks that see serious articulation — off-road rigs with lifted suspension or frequently loaded beds — neoprene edge guards slide over the bar’s top edge and compress on contact instead of scraping. They add 3-4 mm of profile height, so measure clearance before installation to confirm you’re not trading one contact point for another.

How to Repair Existing Paint Scuffs From Nerf Bar Contact
Surface Scuffs (Clearcoat Only)
If the damage hasn’t penetrated base coat, a single-stage polish removes the mark without repainting. Mask off the surrounding panel, apply cutting compound with a foam pad, and work in overlapping passes until the scuff blends into surrounding finish. Follow with a fine polish to restore gloss, then seal with carnuba or ceramic coating.
Exposed Base Coat
When clearcoat is gone but color remains, you need a two-part touch-up. Clean the affected area with isopropyl alcohol, apply OEM-matched base coat in thin layers until the depression fills level with surrounding paint, then spray clearcoat over the entire repair zone. Wet-sand with 2000-grit after 48 hours of cure time, then polish to integrate the repair.
Down to Primer or Metal
Deep gouges require full paint system rebuilding. Sand to bare metal, apply etching primer, then build up base and clear in separate sessions with full flash time between coats. This level of repair often benefits from professional color-matching — OEM paint codes shift slightly between production years, and a mismatched repair is more visible than the original scuff.

Mounting Upgrades That Eliminate Future Contact Risk
Aftermarket brackets with built-in standoff geometry push the bar 10-15 mm farther from the body than factory-style mounts, which solves clearance problems without requiring suspension modification. These brackets typically bolt to the same frame holes as the original hardware, so installation is a direct swap with no drilling.
Some high-clearance designs relocate the upper mounting point to a reinforced section of the frame rail, which raises the entire bar assembly and increases clearance at the rocker panel. That approach works best on trucks with factory lift or oversized tires, where the added step height doesn’t compromise usability.
For crew cabs where door swing and bed length leave minimal mounting options, a cab-length nerf bar design eliminates the long unsupported span that causes center-section flex — shorter bars deflect less under load, which keeps them farther from paint during entry cycles.
Protecting Your Truck’s Finish While Keeping the Benefits of Side Steps
Paint damage from nerf bar contact is mechanical, not random — it follows predictable patterns driven by mounting compliance, load deflection, and clearance gaps that close over time. That predictability makes it preventable with the right hardware choices and inspection habits.
Catch the problem at the dust-smudge stage, and a 15-minute tape application solves it. Wait until you see bare metal, and you’re looking at primer, base coat, and clearcoat sessions that take a full weekend to cure properly.
The inspection intervals we’ve outlined aren’t arbitrary — they’re based on the duty cycles we see across thousands of customer installs, from daily-driven crew cabs to rigs that spend weekends on trails. Monthly visual checks and six-month torque verification catch 95% of contact issues before they become visible damage.
Common Questions About Nerf Bar Paint Contact
Rubber spacers between bracket and frame do increase standoff distance, but they also introduce compliance that allows the bar to shift under load. If you go this route, use only hard durometer material — 70A or higher — and verify that added thickness doesn’t cause the mounting bolt to bottom out in its hole before reaching proper clamp force.
A better solution is a spacer machined from aluminum or steel, which maintains rigidity while pushing the bar outward by a known, consistent amount.
Nerf bar wear creates a horizontal line at consistent height along the rocker panel, usually with a polished or burnished appearance where metal has rubbed repeatedly against the same spot. The damage often appears in a narrow band directly above the bar’s top edge.
Rock chips are random in placement, deeper at the point of impact, and typically show sharp edges with no directional pattern. If you see a continuous scuff line that follows the bar’s contour, contact is the cause.
Most OEM corrosion warranties exclude damage caused by aftermarket accessories, and nerf bar contact qualifies as accessory-induced wear. If the scuff exposes bare metal and rust develops, the warranty claim will likely be denied unless you can demonstrate the bars were installed and maintained according to kit instructions.
That’s why catching contact early — before metal exposure — matters beyond cosmetics. Clearcoat scuffs are repairable without triggering warranty exclusions.
Wax and ceramic coatings add a sacrificial layer that absorbs light abrasion, but they won’t stop metal-on-metal contact from eventually breaking through to base coat. Think of them as a delay tactic, not a solution — they buy you time to address the underlying clearance or mounting problem.
If you’re already applying coating, add helicopter tape over the top for real impact resistance. The coating helps the tape adhere better and prevents edge lift.
Textured finishes — especially aggressive diamond-plate or knurled patterns — concentrate contact force into smaller surface areas, which accelerates paint wear compared to smooth polished bars. Powder coat itself is harder than automotive clearcoat, so it acts like sandpaper when rubbed repeatedly against paint.
If contact is unavoidable due to suspension geometry, a smooth polished bar causes less damage per contact cycle than a textured one. But the real answer is fixing clearance, not choosing a less-damaging finish.
If the wear is still at the clearcoat stage and you apply protective tape immediately, you can continue using the bars while waiting for upgraded hardware. But once base coat is exposed, every additional contact cycle risks introducing moisture and starting a rust process that spreads under surrounding paint.
In that case, remove the bars or install temporary spacers to eliminate contact until permanent mounting upgrades arrive.